Getting Started
This blog post will explain how you can easily add Preact to your Next.js application to reduce Next.js' bundle size.
Note: Preact isn't compatible with Next.js App Directory. Next.js App Directory serves less client-side JavaScript by default.
Preact installation
Preact can be easily installed with the following command:
npm install preactbash
Next.js configuration
To enable Preact, we must edit our Next config.
module.exports = {
  webpack: (config, { dev, isServer }) => {
    // Note, preact is only enabled for production builds (`next build`)
    if (!dev && !isServer) {
      config.resolve.alias = {
        ...config.resolve.alias,
        "react/jsx-runtime.js": "preact/compat/jsx-runtime",
        react: "preact/compat",
        "react-dom/test-utils": "preact/test-utils",
        "react-dom": "preact/compat",
      };
    }

    return config;
  },
};
js
Usage
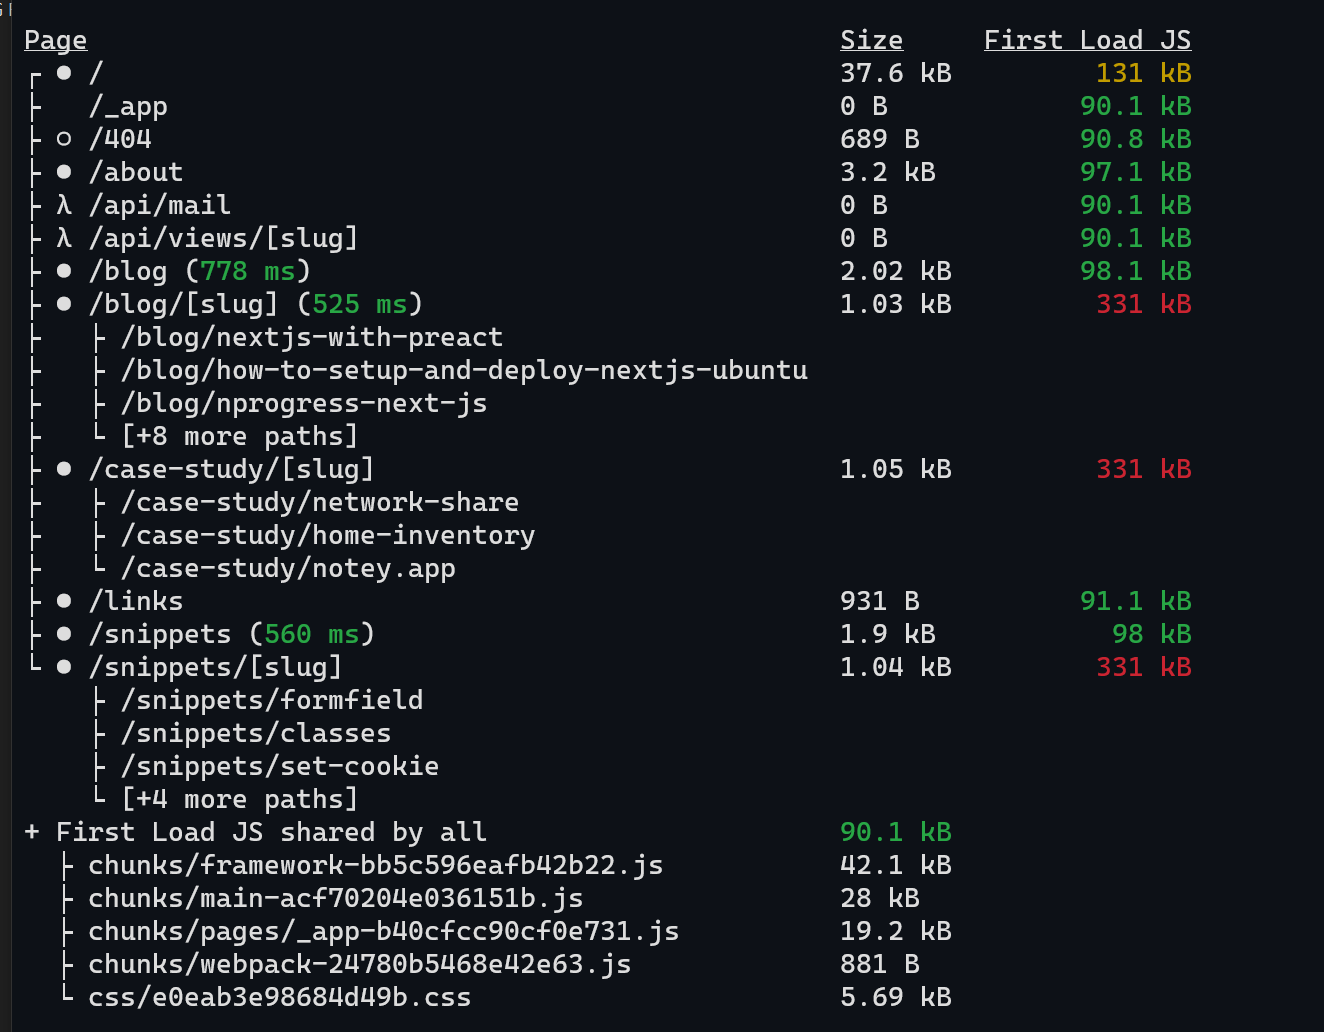
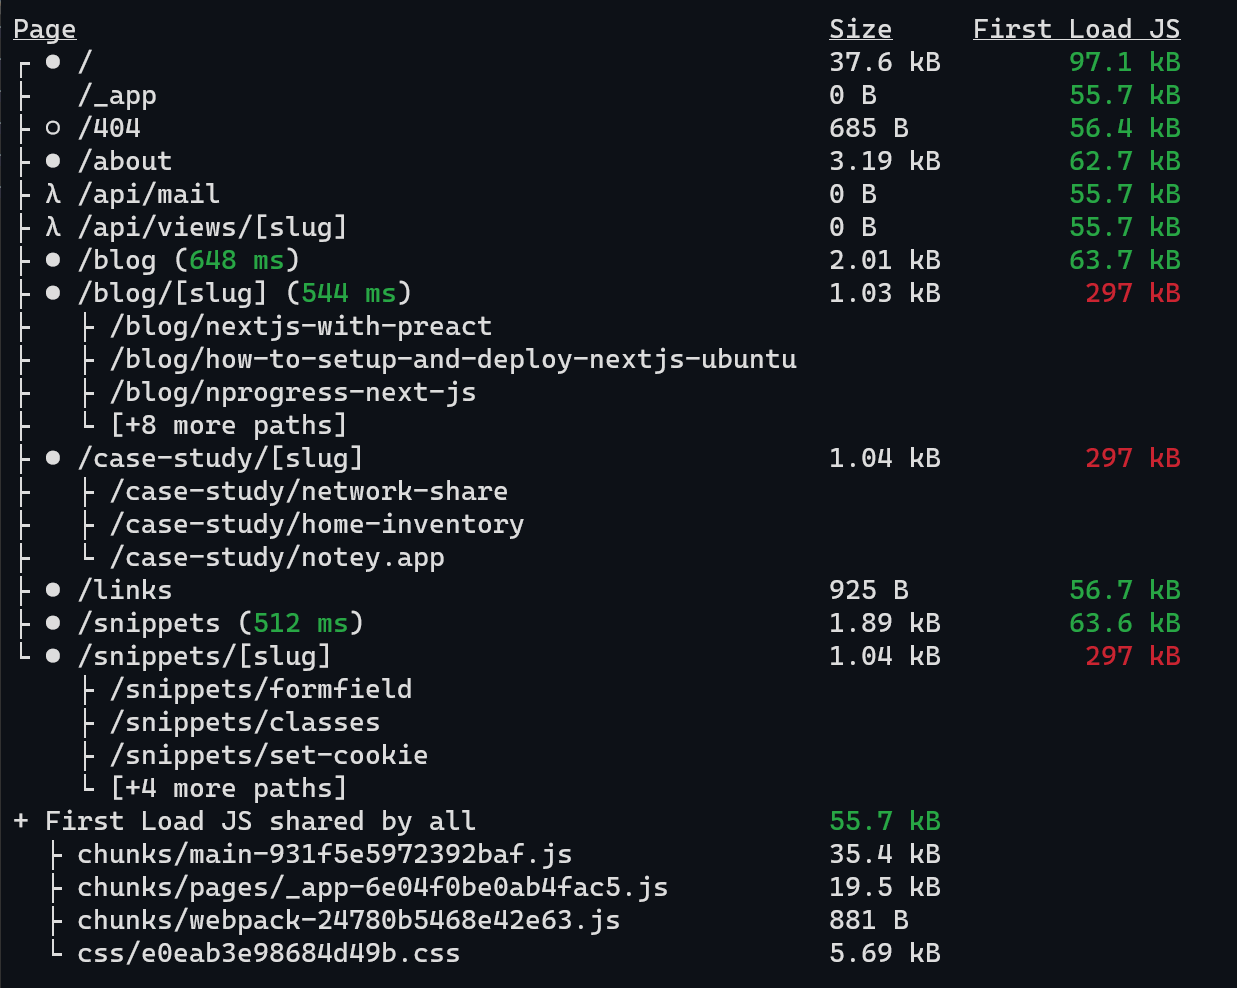
Once you build your Next.js application, you should see a decrease in bundle size. Below you can see the results on my site.
That's it
Yes, that's it! It's super easy 🚀!